Tuesday, May 15, 2012

Tuesday: DIY Hairspray

I recently ran out of hairspray and thought that there just HAD to be some way to DIY hairspray. Lucky for me, there is! (and it runs on the el cheap side, so I was a fan. We're talking under 25 cents and only 5 minutes to make. Total win.

Materials
4 tsp sugar
1 cup water
1 tb vanilla
Spray bottle

Heat water to boiling, add the sugar and vanilla. (in this case, the alcohol in the vanilla is used as a stabilizer and preservative, and the scent is a bonus! If you don't have real vanilla, DON'T use imitation, just use a 1 tb of vodka and a few drops of your favorite scented oil).

Put the mix in a spray bottle and you are good to go! DIY hairspray on the fly! Loving the DIY beauty care? Try out DIY Blush! Or DIY Sugar Scrub! Or DIY Bath Salts! Money savers, fun gifts- you can't go wrong.

Monday, May 14, 2012

Monday: 4 Things You Should Never Say to Your Child

If you are like most moms, then you really want to be, well, a good mom! You probably think about it all the time, worry, wonder what your kids will be like when they grow up.... On your road of trying to be the best mom, here are a few things that you should never say to your children.

 1. Stupid, dumb, slow-witted, retarded, etc. Any word that denotes a low intelligence should not be used, especially when joking. Some parents think that it is ok to say words like these teasingly, but in reality, children don't get a good grasp on how jokes work until they are nearly adults. You may feel like it is funny, and they may even laugh, but the truth is that it can leave a  wound deep in them.

2. Fat, chubby, overweight, even 'not that skinny' are all terms to be avoided. Your children, especially your girls, are growing up in a world obsessed with image. They will be pummeled with digs about their looks. The absolute last place that a child needs to hear an insult about their weight is from their mother.

3. "We don't______with ______ kind of people". Children learn their attitudes about the world at home. Even if you find yourself struggling to see people equitably, DON'T pass that on to your children. Love them enough to want them to have a fresh, unadulterated view of the world. Love them enough to not raise them with racism or biases.

4. "Your father is such as _______". Almost more important than the way you treat your children is the way that you treat their father. Even if you are separated from your spouse for one reason or another, that person is still the father of your child and will have exposure to your child. Don't ever try to pit your child against the other parent- it is an awful position to be in. You want the best for your child, right? Your child will most likely end up with someone like their parents. If you build a poor image about your spouse to your child, then they are more likely to end up with exactly the kind of person you describe. The way that you speak about your spouse will change your child's view of them (for good or for bad) and they will subconsciously learn that whatever kind of a person you describe is an ok person to be married to.Whatever your spouse might be, if you insult them to your children (stupid, lazy, jerk, etc.), then you are increasing the chance that your child will marry a stupid, lazy jerk. And I think it's safe to say that is not what you want for your child.

Keep plugging on and plugging on- keep on trying to do your best for your child. As long as you are constantly striving to be your best, you can feel safe that

You. Are. A. Good. Mom.

Now that you've mastered four things to never say to you child-

5 Ways to be a More Productive Stay at Home Mom

5 Ways to be a Happier Stay at Home Mom

Saturday, May 12, 2012

Friday: DIY Up-cycled Cereal Box --> Darling Daily Planner

I have needed a new daily planner for some time, but was a bit too, well, cheap to buy the kind I liked- so I decided to use an empty cereal box to make my own! Here's how to do your own, step by step.

Step 1
MATERIALS NEEDED
*Empty cereal box
*Printed planner pages (50-100)
*1 striped sheet and 1 polka dot sheet of paper
*Clear masking tape
*Letter stickers
*Needle and thread
*Scissors

Step 2
Step 1
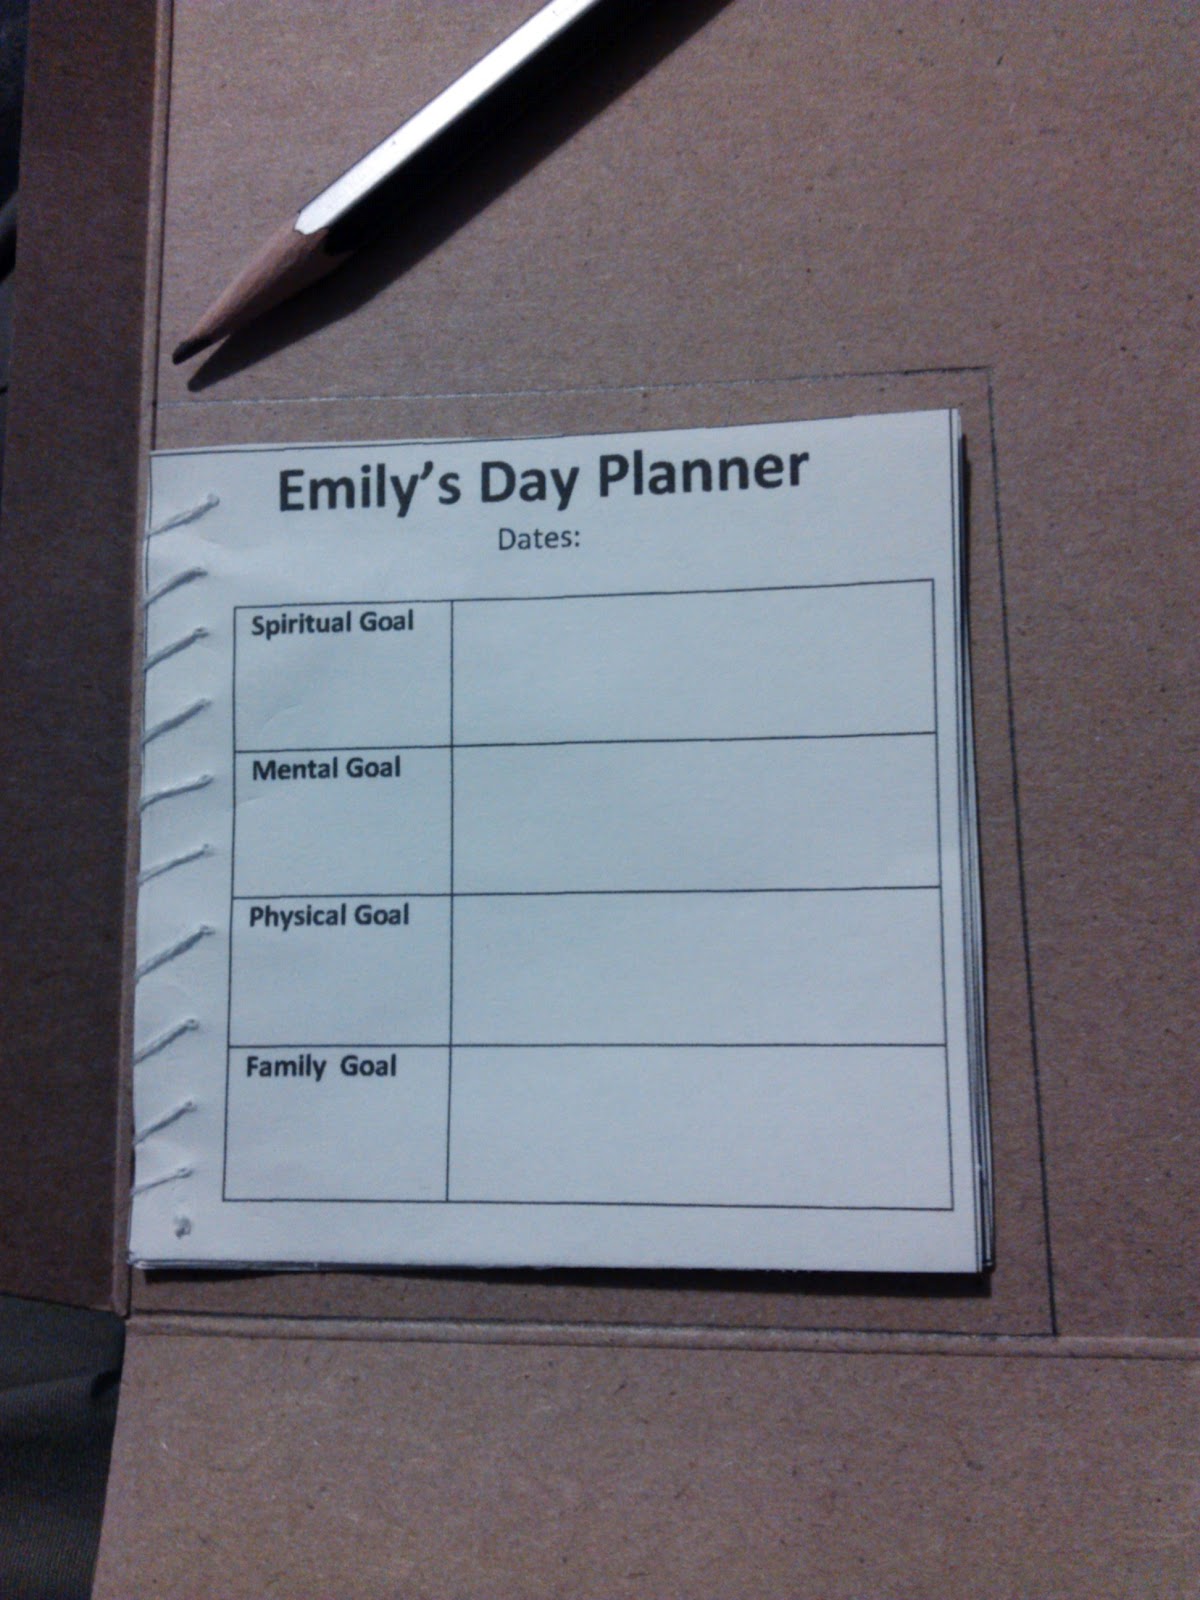
Choose the size of your planner-to-be by printing off the inside pages- include whatever information you think is pertinent (date, times, goals, etc.) I chose to keep my simple, with just a few goals, then a general blank space to put whatever I needed for the day. Once you have them printed off (or, hand-write them if you prefer), cut them all to the same size of sheet

Step 2
Step 3A
Using your needle and thread, sew together 10 pages together at a time (I did 5 packs of 10 each)

Step 3B
Step 3

Carefully take your cereal box apart and then, using the section that has just a small lip of cardboard bent up, trace around one of your bundles of paper. Make this outline 1/2 inch or so larger than your sewed bundle of papers. Repeat this step so that you have two identical sized pieces of cardboard.
Step 4B

Step 4
Step 4A
Slide these two pieces of cardboard together to form the cover of your planner. Place a piece of clear masking tape on the top and bottom of the center piece, just enough to make it hold it together.

Step 5

Step 5A
Step 5B
Once the cover has been secured, secure the paper that you chose for the inside of your book (I chose this turquoise polka-dot) with a few small pieces of tape. Once it is secured, use the masking tape in strips to completely cover the paper
Step 6
Next, in the same way that you covered the inside of the cover with paper, cover the outside of the cover. Overlap slightly on the inside of the cover to make it look almost like a dust jacket.

Step 7 (almost done!)

Step 7A
Once your cover is finished, use a needle and thread to sew the pages into your book. Tie a knot at the end of the thread and thread it through the top of the cover, right in the middle. Next, thread the needle through each booklet of papers, one at a time, then back through the top of the cover. Repeat this by going around it twice to hold your book together strongly. Next, repeat this step for the bottom of the cover so that your book is secured strongly. (You may want to add an extra piece of masking tape to cover the exposed piece of thread on the outside). Lastly, use your stickers to name your planner. Mine was simply 'Emily's'.
Step 7B

YAY! You did it! And what's extra nice is that once you have used up all the papers on the inside, you simply need to cut the thread that holds the pages in and re-thread in some new ones. Way to up-cycle! I hope the extra-illustrated instructions helped!
Step 7C

Need to upcycle even more? How about upcycling some empy paper towel rolls into a Disposable Flower Vase, a DIY Wall Hanging or a 3D Dragonfly!